IMPOSSIBLE SCENARIOS
DUNES
Quote from Map Description
Impossible Scenarios within this map are � Copyright [Ess_Tee_Eff_You] Productions. All rights reserved.
Permission granted to host this map for recreational purposes or testing purposes ONLY.
Permission is NOT granted for unpermitted modification. To obtain permission, contact Buon@U.S. East (Pronogo@hotmail.com).
Permission granted to host this map for recreational purposes or testing purposes ONLY.
Permission is NOT granted for unpermitted modification. To obtain permission, contact Buon@U.S. East (Pronogo@hotmail.com).
The goal of this map was to test my skills at making fun maps. I think I've accomplished it.
Quote from Pronogo
SPECS:
Players: Three (3) humans, Two (2) computers, One (1) neutral player
Map Size: 192 by 256
Percent Complete (%): ~100% (see bottom)
Difficulty for Map 1: Hard
Difficulty for Map 2: BITCH Hard
Players: Three (3) humans, Two (2) computers, One (1) neutral player
Map Size: 192 by 256
Percent Complete (%): ~100% (see bottom)
Difficulty for Map 1: Hard
Difficulty for Map 2: BITCH Hard
Image Time!
Encounter 1's goal is to use a single Ghost (red), two Medics (blue) and three Marines (teal) to eliminate two Supply Depots (yellow). Note that these are the ONLY things necessary to win.

Encounter 2's goal is similar. Destroy a Barracks (yellow) via two Vultures (red), a Siege Tank (blue) and two SCVs (teal). Repairs are free. Also note that you have tech in the lower-right hand corner (second picture).


Encounter 3's goal is to use an assortment of infantry (red), three Goliaths (blue) and two Siege Tanks (teal) to pwn an Academy. Several Zerg and Terran guardians are positioned throughout.

Encounter 4 is REALLY hard. If you get this far without dying and having to remake (which is definitely possible), I highly suggest you save now.
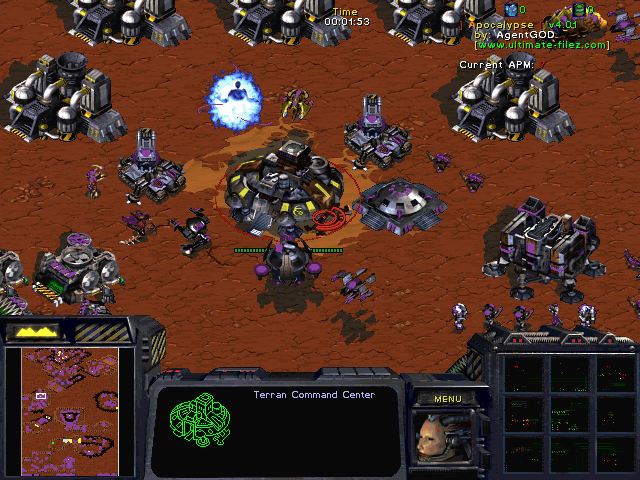
The goal is to destroy a Command Center. The Command Center is invincible and will remain that way until you destroy five Refineries (pictured).

Encounter 5 is fairly difficult. If you lose the Observer, you'd better have someone really good at micro playing the Archon (teal).
The goal is to transport two SCVs across a chasm. Several Zerg are on the cliffs, along with a small (but extremely deadly) Terran outpost. Along with that, two Spider Mines and two Protoss Zealots stand guard. You get two SCVs and a Siege Tank (red), a Dark Templar and an Observer (blue) and an Archon and two Zealots (teal). The "Go Here to Win" name is for the Terran Beacon, which represents the location two SCVs are meant to go.

Encounter 6 tasks you with destroying a Zerg Hive (yellow) with a High Templar, a Reaver and an Observer (red), a Battlecruiser (blue) and three Scouts (teal). Lots of enemy traps require micromanagement to the extreme, and you'll want to keep the Battlecruiser's HP as high as possible. You'll need him for the end.

The following screens are from Encounter 7, which splits your forces up and requires you to destroy a Factory.

Red's forces.

Blue's forces.

Teal's forces.

The ladder portion of Encounter 7 is making it to the Terran Beacon. That transports you from here...

...to here, where you get minor reinforcements...

...and have to fight all the way through a deadly labyrinth to here...

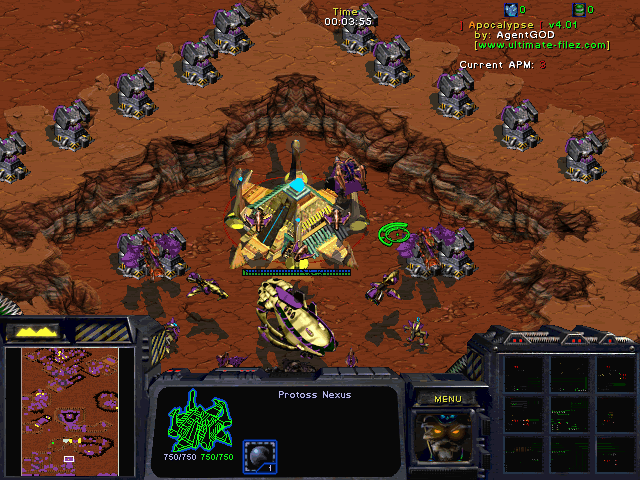
...and FINALLY destroy an enemy Nexus (yellow)

If you manage to get past that, save and listen up! You'll need to read the directions before you get to run off and die.


I'm saving the best for last. I'm also making sure I don't spoil the last encounter.

Good luck, and PLEASE tell me of any bugs or suggestions!
- - - - -
- 100% -
The thing is, I fixed a lot of bugs for the normal version and I'm not sure how well they carried over to the hard version. Please notify me of any bugs.
- - - - -
All screens are taken from the normal version.
- - - - -
BUG FIX! Now the Infested Command Center in Encounter Nine is accessible.
Post has been edited 2 time(s), last time on May 10 2009, 5:24 am by Pronogo. Reason: Bug fix


