Staredit Network > Forums > SC1 Terrain > Topic: [ ] Inf Tutorial 1 - Basic Badlands Buildings
[ ] Inf Tutorial 1 - Basic Badlands Buildings
Sep 19 2009, 6:06 pm
By: lil-Inferno  

Sep 19 2009, 6:06 pm lil-Inferno Post #1

Just here for the pie

Quote
In this tutorial we're going to go into the fatty layer of Badlands that is buildings. Construction of a building in Badlands may look like a tedious process, but when it's all chopped up into bits and pieces, the load may seem a bit lighter.


Step 1: Let's start with a fresh canvas of null.
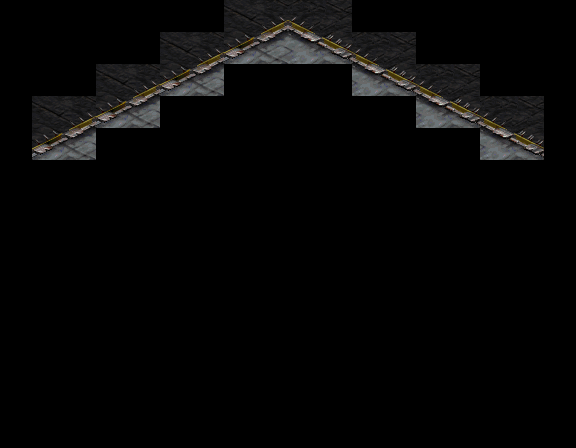


Step 2: The foundations of our building will begin with the back end of a roof.
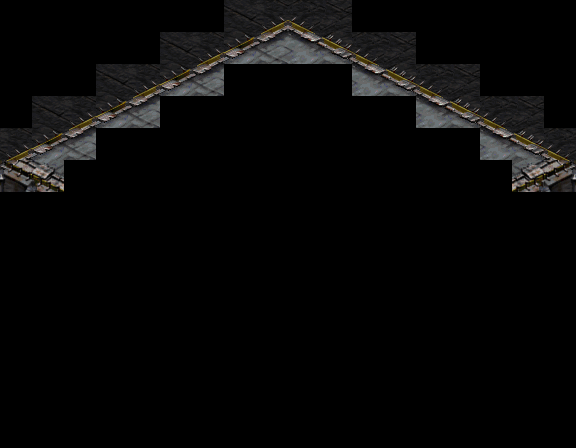


Step 3: These end pieces are added to ensure that the building won't have 'openings'.
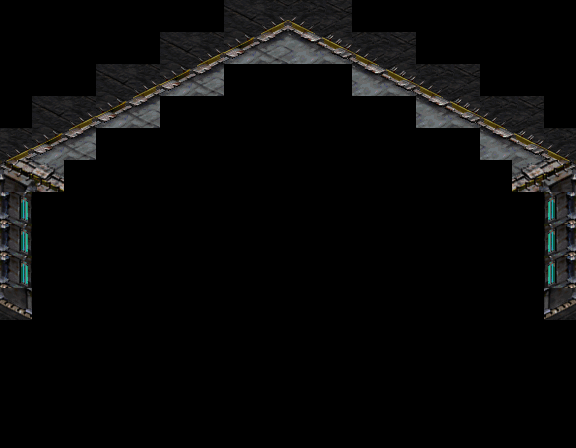


Step 4: An "enclosure" piece is dragged down from the end pieces to cover up openings. Make sure the number of "light" parts are a multiple of three, otherwise the building's body won't come out well.
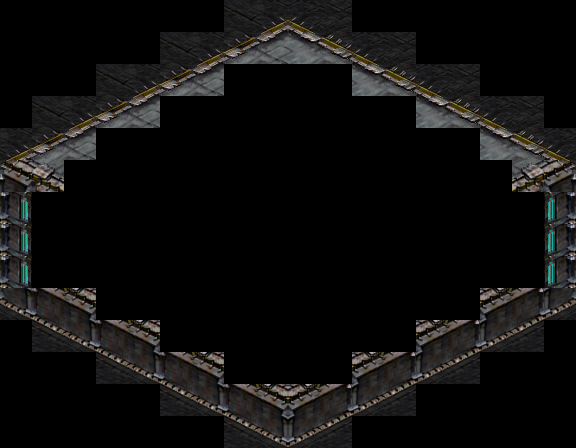


Step 5: A base is added to the building.
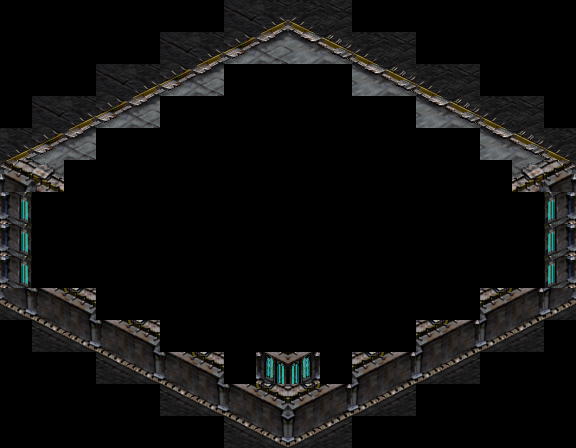


Step 6: This small 2x1 piece is added in the middle so that the body doesn't look messy. Keep in mind that larger buildings may need this 2x1 piece more than once.
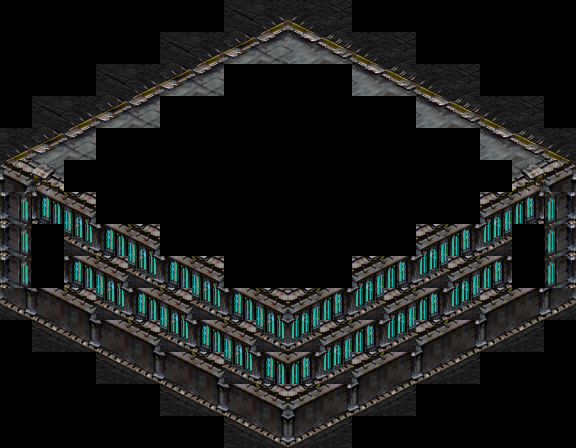


Step 7: The body of the building is placed. Notice the holes left on the side.
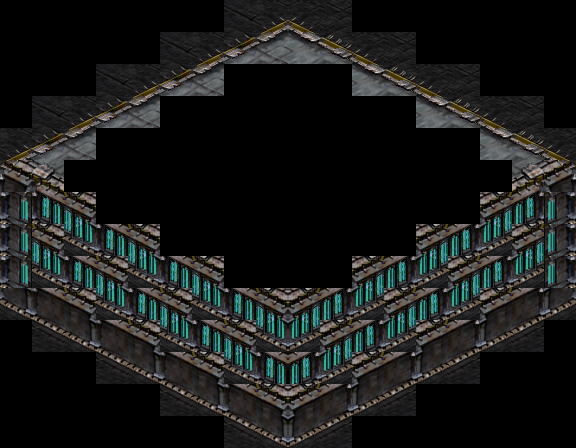


Step 8: Fill up the holes by copying and pasting the 1x2 part of the body piece.
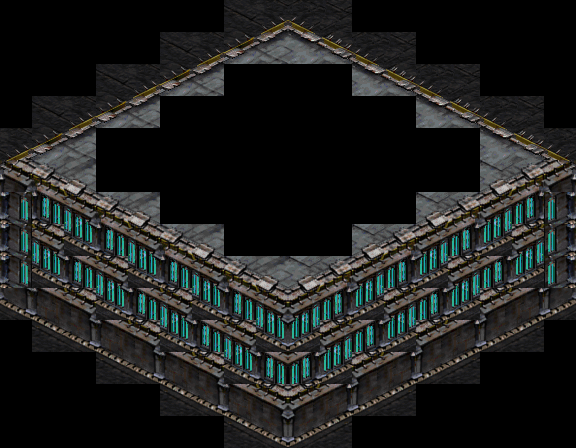


Step 9: The border of the roof is added.
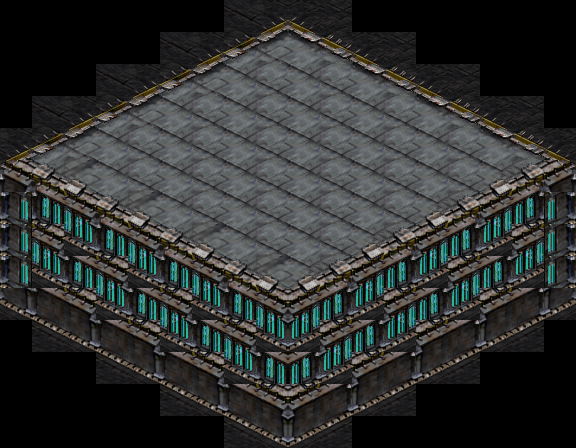


Step 10: The body of the roof is added to fill in the naked null part.
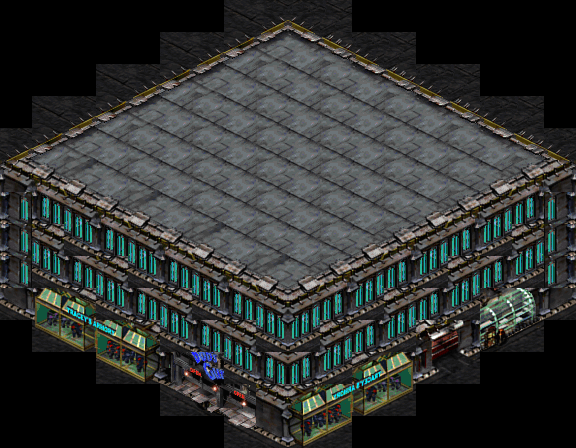


Step 11: Spit and polish. Add doodads to the base of the building to customize it a little bit.
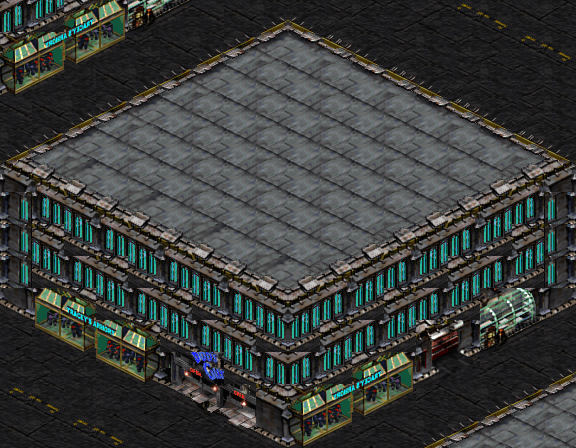


After some practice, Badlands buildings can be used to make city scenes, both large and small.

Map used in screenshots
Brush used for making buildings

I may rewrite it later to make it more interesting to read. Hope you guys like it ^^.

Post has been edited 2 time(s), last time on Oct 21 2009, 8:22 pm by lil-Inferno.


Sep 19 2009, 6:29 pm payne Post #2

:payne:

For now, it is pretty basic, yet so explicit ^^
Though you may want to say how you've chosen these tiles that are supposed to fit inside. Are they always these blue light thingy or...?
I myself learned a lot with this since I had never done such blends :P

Btw, a question to all: should that kind of section (or simply all of them) be within a "collapse" box and specific titles?


None.

Sep 19 2009, 8:10 pm lil-Inferno Post #3

Just here for the pie

Quote from payne
Btw, a question to all: should that kind of section (or simply all of them) be within a "collapse" box and specific titles?
I think that readers would rather have the tutorial all laid out for them than having to click the + to view each individual portion.


Sep 19 2009, 8:28 pm payne Post #4

:payne:

Then we must find a way of making images incorporate better the text because as it is right now, when they'd scroll down to find something quickly, it will just look like if the whole wiki was a bunch of ugly looking pictures with very little text...


None.

Sep 19 2009, 10:24 pm The Starport Post #5


Remember the wiki has that Table of Contents button thing for just that use. I think you have to use the [h1], [h2], and [h3] tags to use it, though.


Seems to 'deactivate' after one click, though. Bug?


None.

Sep 21 2009, 3:18 pm samsizzle Post #6


nice job, i think it's pretty much perfect. You don't drone on about stuff and you show everything really simply. But you could put in a part about how there's a number of tiles that can fit in the spot where you put the blue neon tiles.


None.

Oct 17 2009, 11:55 pm payne Post #7

:payne:

Inferno, make this with points like this and it should be ready to be put into the Wiki :D :

Code
[color=#86EE59]Step 1[/color]: Blabla
[collapse=image][img][/img][/collapse]
[color=#86EE59]Step 2[/color]: [...]


None.

Nov 17 2009, 11:40 pm payne Post #8

:payne:

Quote from payne
Inferno, make this with points like this and it should be ready to be put into the Wiki :D :

Code
[color=#86EE59]Step 1[/color]: Blabla
[collapse=image][img][/img][/collapse]
[color=#86EE59]Step 2[/color]: [...]
This.

Plus, if you could make it in relation with a brush, it would be awesome! :O
Please work on it. It's very near from completion ^^


None.

Nov 18 2009, 1:27 am lil-Inferno Post #9

Just here for the pie

Quote from payne
Quote from payne
Inferno, make this with points like this and it should be ready to be put into the Wiki :D :

Code
[color=#86EE59]Step 1[/color]: Blabla
[collapse=image][img][/img][/collapse]
[color=#86EE59]Step 2[/color]: [...]
This.

Plus, if you could make it in relation with a brush, it would be awesome! :O
Please work on it. It's very near from completion ^^
It is in correlation with a brush. Look at the bottom/read the whole thing before posting. I don't get why I need to put the images in collapse boxes, but whatever. I'll have to work some time into my schedule in order to do it :).


Nov 18 2009, 2:31 pm payne Post #10

:payne:

Quote from lil-Inferno
Quote from payne
Quote from payne
Inferno, make this with points like this and it should be ready to be put into the Wiki :D :

Code
[color=#86EE59]Step 1[/color]: Blabla
[collapse=image][img][/img][/collapse]
[color=#86EE59]Step 2[/color]: [...]
This.

Plus, if you could make it in relation with a brush, it would be awesome! :O
Please work on it. It's very near from completion ^^
It is in correlation with a brush. Look at the bottom/read the whole thing before posting. I don't get why I need to put the images in collapse boxes, but whatever. I'll have to work some time into my schedule in order to do it :).
I meant that you should make direct and explicit references to the brush itself. For example: "In order to have a 20x12 building, you'll need to place a "top roof" and then place 3 "left/right roof edge" " (not sure if these are the exact names into your brush ;o.


None.

Nov 19 2009, 2:57 am lil-Inferno Post #11

Just here for the pie

Quote from payne
I meant that you should make direct and explicit references to the brush itself. For example: "In order to have a 20x12 building, you'll need to place a "top roof" and then place 3 "left/right roof edge" " (not sure if these are the exact names into your brush ;o.
The brush goes in the exact same order as the tutorial does. Like I said before, you should check it out before you make any judgments.


Nov 19 2009, 3:19 am payne Post #12

:payne:

Quote from lil-Inferno
Quote from payne
I meant that you should make direct and explicit references to the brush itself. For example: "In order to have a 20x12 building, you'll need to place a "top roof" and then place 3 "left/right roof edge" " (not sure if these are the exact names into your brush ;o.
The brush goes in the exact same order as the tutorial does. Like I said before, you should check it out before you make any judgments.
Shadup, teal > you, okay? >:O
But else, ya, I'm sorry. I had looked at your brush but didn't see the relation. Sorry again ^^
So this is final product ? If not already done, post it in the Wiki :D

Again, good job over this tutorial, inf =)


None.

Options
  Back to forum
Please log in to reply to this topic or to report it.
Members in this topic: None.
[05:50 am]
NudeRaider -- WOOOO PHYSICS!
[08:54 pm]
Vrael -- WOOOO METAPHYSICS
[06:06 pm]
dumbducky -- Aint no party like a lemon party
[2024-9-17. : 4:20 pm]
Vrael -- :wob: lets get this party starrrrtttteeeeedddd :wob: :lock: :wob: :lock: :wob:
[2024-9-16. : 6:51 pm]
Ultraviolet -- :wob:
[2024-9-15. : 6:12 pm]
Ultraviolet -- Agree, but GL getting any work on SEN done in 2024 lol. The (Price Per Ticket / 2) is the worst part of it imo, it's only worth buying in when the base jackpot is quite high and the price per ticket is quite low.
[2024-9-15. : 5:42 pm]
Zoan -- This new one is just a mineral sink most of the time
[2024-9-15. : 5:42 pm]
Zoan -- We should bring back the old raffle
[2024-9-15. : 2:28 am]
Ultraviolet -- :wob:
Please log in to shout.


Members Online: eksxo